When I was in high school, I purchased an old bike from a farm auction. It was in decent shape, as I recall it, but I ended up tearing it down and rebuilding it, just to see if I could do it.
It was a single-speed “Western Flyer”, sold by the Western Auto chain of stores. I’m guessing it was early-to-mid 1970s vintage, based on when I acquired it. The coaster brake reaction arm was stamped “Bendix 70 Mexico”, so that may mean it was made in 1970.
For the last 30 years or so, that bike has been sitting in a work shed at my parent’s farm, seldom ridden, gathering dust and rust.
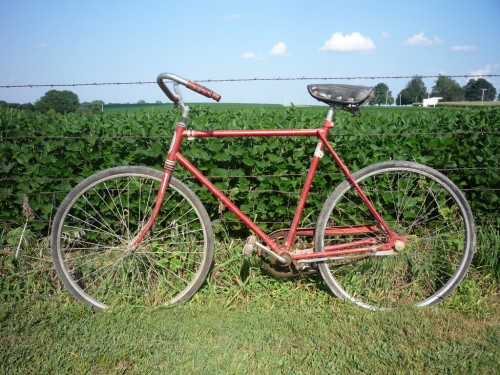
On my last visit, I examined the bike:
At first glance, the bike didn’t appear in too bad of a shape — just some cleanup needed. But looking closer, I found a long list of problems:
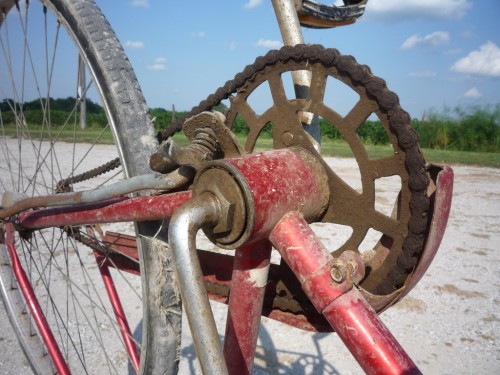
- Bottom bracket/cranks were loose
- The pedals were trashed
- The front fork had quite a bit of slop/wiggle
- The handlebar was bent
- The chain was perhaps too far gone to save
- There was significant rusting on the wheels
- A bolt was missing from the saddle, and it was in pretty rough shape
- The wheels were of low quality, with a number of loose spokes
- The kickstand was held on with baling wire
- The back tire was in really bad shape, with the inner tube actually peeking through at one location
- The front tire was pretty bad as well, though it was rideable
The only thing that was in anything close to good shape was the frame — even though the paint was scratched and chipping in a few places, it didn’t appear to be bent or dented, and was structurally sound.
So, was it worth putting any money into this bike?
It certainly wouldn’t be worth much on the open market. It wasn’t old enough to be a valuable antique, and was a fairly low-end bike to begin with. Really, the only reasons to even consider refurbing it was that I liked the look of the bike (which I do), and it holds some special memories.
At a minimum, it needed new tires, and probably a new handlebar. It used 26″ tires, so I was thinking I could use some of my old MTB tires, and I had some old but serviceable saddles lying around.
I decided to take it home and investigate further.
I showed pictures of the bike to a friend who worked in a bike shop, and he thought I’d need to spend perhaps $75 to make it rideable. That was certainly at the high end of what I was hoping to spend. I could buy a new department store bike, or a used, reconditioned bike, for not much more than that.
But, by chance, there happened to be a bicycle swap meet coming up at the shop where my friend worked. I figured I’d go and see if I could scrounge up some old parts on the cheap.
I took the bike along and showed my friend, who said it looked somewhat better in person than it did in my pictures, and he was optimistic that it could be fixed up pretty easily.
Even better, he steered me to an old bike that I could rob part off of. Amazingly, the bike (a 3-speed “John Deer” bicycle that someone had spray-painted black) turned out to have nearly everything I needed — new tires, useable handlebars, and even the same exact saddle, except in much better condition. It even had brakes and fenders, if I wanted them. The cost: $10. Sold!
So I started the teardown-clean-lube-rebuild process. It took awhile, and I didn’t take any usable pictures, mostly because my hands were covered in grease and grime much of the time.
The handlebar swap was a little harder than I hoped. The stems on the old bike and the donor bike were different sizes, so I had to figure out how to get the bar out of the stem on both bikes, which meant taking off the handlebar grips (a small screwdriver and a shot of WD-40 under the grip worked wonders) and brake levers. But I eventually got that all squared away.
Unfortunately, the looseness of the front fork was a problem I couldn’t figure out. It seems that the threads on the steerer tube are a bit stripped out, and they won’t hold. I can get things “kinda” tightened down, but it still has some wiggle. Fortunately, I think it’s more of an inconvenience than a safety issue.
The rework of the rear coaster brake hub — a marvel of simple yet elegant and robust engineering — went well. It doesn’t turn as smoothly as I’d like, and I’m not sure if that’s due to poor reassembly or just low-quality bearings, but it’s good enough. It works.
I thought the rebuild of the bottom bracket went well, too, but when I got it all back together and tried to ride it, it didn’t work right. It rotated “crooked”, and there were a few big “clunks” as I pedaled hard.
I took it back apart and found that three ball bearings had slipped out of their retainer, and the retainer was bent. Oops. I didn’t know if it was damaged before I took it apart or when I put it back together. I went to the LBS and picked up a couple new bearing assemblies, and advice on assembly. It sounded like I didn’t take enough care when threading the one-piece crank through the bottom bracket, and pinched the bearings.
This time, I payed closer attention, and all was well. Again, it didn’t rotate as smoothly as I’d hoped, but it was good enough.
The tires situation turned out a little differently than I expected. Apparently, 26 inches does not equal 26 inches.
The refurb bike uses 26″ x 1-3/8″ (37 x 590 mm) wheels and tires.
The MTB tires I wanted to use are 26″ x 1.50″ (40 x 559 mm).
Way different. Oh well, good thing I had the tires from the donor bike.
The tubes were another story. Both tubes from the donor bike were bad. On one tube, the stem leaked, so it wouldn’t hold air. On the other tube, the stem was choked with dried Slime, so it couldn’t be filled.
Luckily the tubes from the old bike were still good. One had a hole (where it had poked through the tire casing), but it was patchable.
The rusty wheels cleaned up nicely. I used chrome cleaner meant for automobile wheels, and a little wire brush, and most of the rust washed away. They trued up reasonably well, too.
I stole the front brake from the donor bike, as a safety feature. This worked fine.
I also repurposed the kickstand from the donor bike.
The saddle turned out to be a problem as well. The new saddle had one bent spring, which meant when you sat on it, it felt lopsided. Again, I was lucky in that I was able to salvage a spring from the old busted saddle. It feels good now (though one spring is clean and one is slightly rusty).
For the pedals, I purchased new plastic pedals from Walmart. Good enough, and not too expensive ($7). The ones from the donor bike were the wrong size (9/16″ vs. 1/2″ spindles).
And finally, the chain cleaned up nicely as well. I soaked it in gasoline, then in Simple Green, then in paint thinner, and all the grime and rust came right off. I checked for wear, and it seems fine. All the links work freely. Good to go.
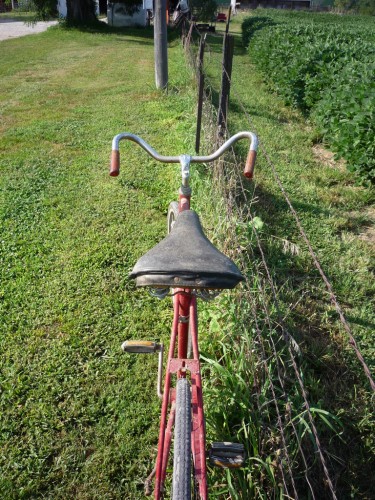
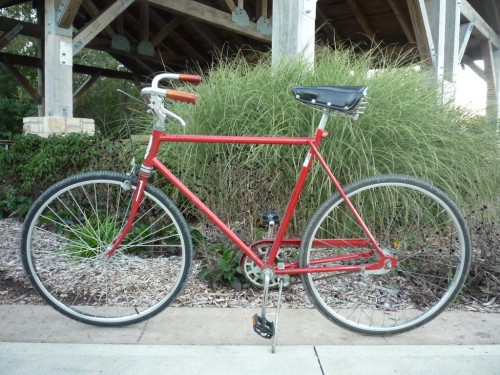
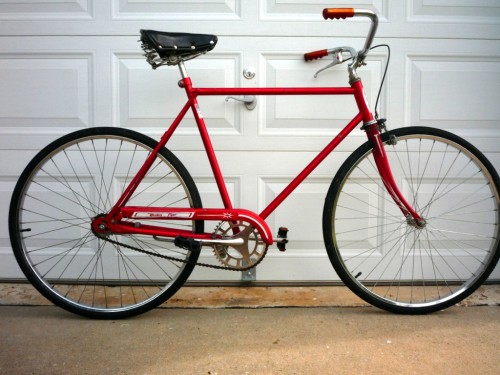
After all was said and done, here’s what I ended up with:
The donor bike turned out to be a lifesaver. I salvaged the handlebar, front brake, brake cable, brake lever, saddle, front tire, back tire, and kickstand from the donor bike. I purchased the pedals and replacement bearings. Everything else was just cleaned up and reused from the old bike.
Total cost was $10 for the donor bike, $7 for the pedals, $2.50 for the bearings, plus whatever cleaning materials I used. So the project was about $20 in hard costs.
I don’t know how much time I spent on this. Quite a bit. But it was fun.
The bike seems to ride pretty well, except for the annoyingly loose headset. The front brake makes it easier and safer to stop.
Oh, one thing I haven’t fixed yet, and something I didn’t notice until I got it all put back together — the right crankarm is bent and slightly twisted. When I’m riding, if feels like the pedal is bent. But it’s not the pedal, it’s the arm. It was probably bent at the same time the handlebars were bent. The bike likely got trapped between some farm equipment at some point in time.
So I’ll keep an eye out for a new one-piece crank. Worst case, that’s maybe $15 to replace.
One thing this project has done is make me appreciate modern bikes: quick-release wheels, derailleurs, water bottle bosses, rack and fender mounts. Another thing: the old bike has a stupid number of different-sized fasteners. I counted 7 different sizes of nuts, some metric and some imperial, plus a few larger, odd-sized ones like on the stem and bottom bracket. My LHT has just a few, mostly metric sizes with internal hex keys — much simpler.
I’ve taken the bike out for a couple short rides, and I think it’ll do fine. It’s a different experience riding an upright singlespeed bike after spending so much time in the last couple years on a drop-bar road bike. But it’s fun. Hills are certainly a different experience, though.
If I’m going to ride it much, I’ll need to come up with a pump and a way to carry water. There are no water bottle bosses, so a water bottle cage would have to be strapped on. The wheels are bolted on, so I’ll need to carry a wrench, plus tube, patches, tire irons, and pump. The saddle has loops, so it’ll be easy to hang a bag off the back. Also, the bike has no reflectors (except in the pedals), so it’ll need a head light and tail light if I want to ride it at night. Sigh.
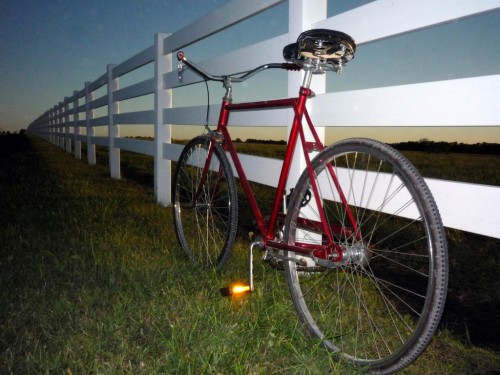
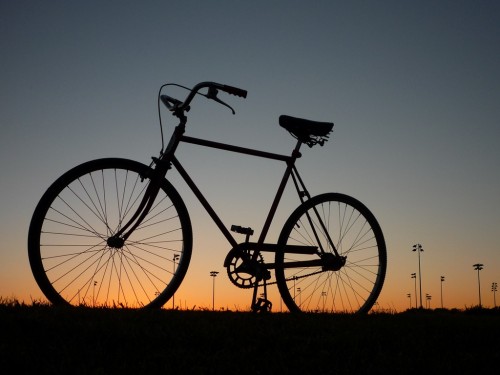
Anyway, here’s the bike in profile at sunset at a local park:
Isn’t that beautiful?!
So simple and clean.
Cool, I had a WA 3 speed back in 72. You can still find them here and there.. It is fun to create someting from nothing..I have been working on my singlespeed for several months..You will always find something better to add to it, or in my case take away, I like simplicity. It’s always better anyhow.
Great job on bringing this bike back to life! I am especially amazed at how little money you had to put into it. If you want a retro water bottle cage for it that clamps onto the frame, I have one in my parts collection that you can have. I can send photos of it if you’re interested.
Nice job, Randy. It looks like it turned out well. It’s really cool to bring life back into those old wheels. I grew up on a farm in west-central Missouri and had a Western Flyer cruiser. This was back in the middle to late sixties. No doubt it is rusted out in some old trash heap. Wish I still had that bike even though, at the time I would have rather had one of those racy “buzz bikes”. I really enjoy reading your blog. I have lived in southwest Missouri (near Stockton Lake) for the past 24 years and started back up riding about 3-4 years ago. I enjoy exploring the gravel roads and less traveled black top roads in my area. I’ve heard of some of the places you blog about on your travels. I hope you continue your website and chronicling your journeys.